Our Roofing Projects
We photograph our work — before, during, and after — so you can see exactly what was done and why. Below: a fully documented September 2026 shingle and ridge repair in Sugar Land, plus a steep-slope repair where rotted decking had to be rebuilt first. More documented projects are on the way.
Get Your Free InspectionPrefer email? Send us the details
Roof Repair in Sugar Land, TX — Shingle & Ridge Repair
Not every roof needs replacing right away. Targeted repairs have helped our customers save time and money by extending the life of their roof — like this September 2026 job in Sugar Land, documented start to finish below.
- Location: Sugar Land, TX
- Service: Roof repair
The problem
Damaged shingles and worn ridge caps — the kind of localized wear that, left alone, lets water work its way under the roof system. The rest of the roof was healthy, so a full replacement would have been the wrong recommendation.
The inspection
Full roof inspection with photos: the damage was localized to the shingles and ridge caps, and the decking underneath was solid — which is what made a targeted repair the right call instead of a replacement.
The solution
A targeted repair: new architectural shingles in the damaged areas and rebuilt ridge caps, matched to the existing roof. Less cost, less disruption, and years added to the roof’s life.
Work performed
- Removed damaged shingles in the affected areas
- Inspected the underlying decking before installing new material
- Installed new architectural shingles, matched to the existing roof
- Rebuilt the worn ridge caps
The result
A weathertight roof with its full expected life restored — documented below, and backed by our 2-year transferable labor warranty on the repair.
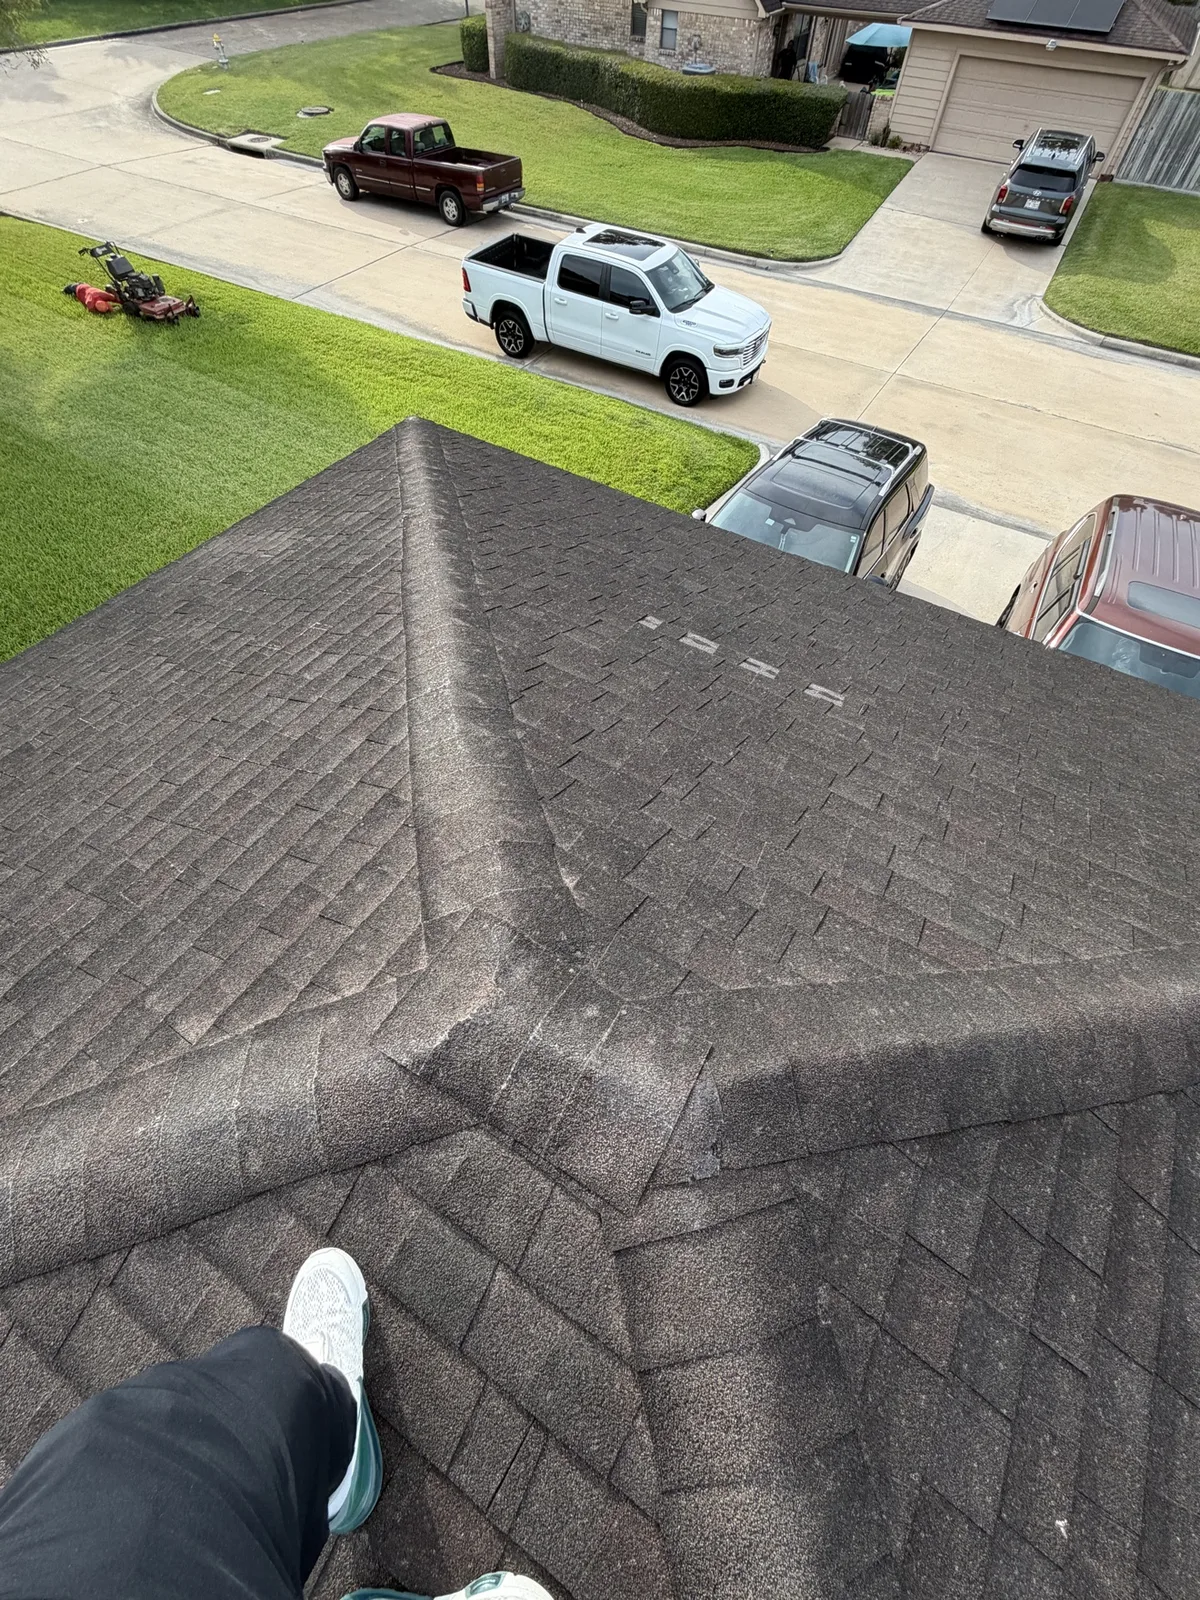
Before — roof view: damaged shingles and worn ridge caps, September 2026, Sugar Land.
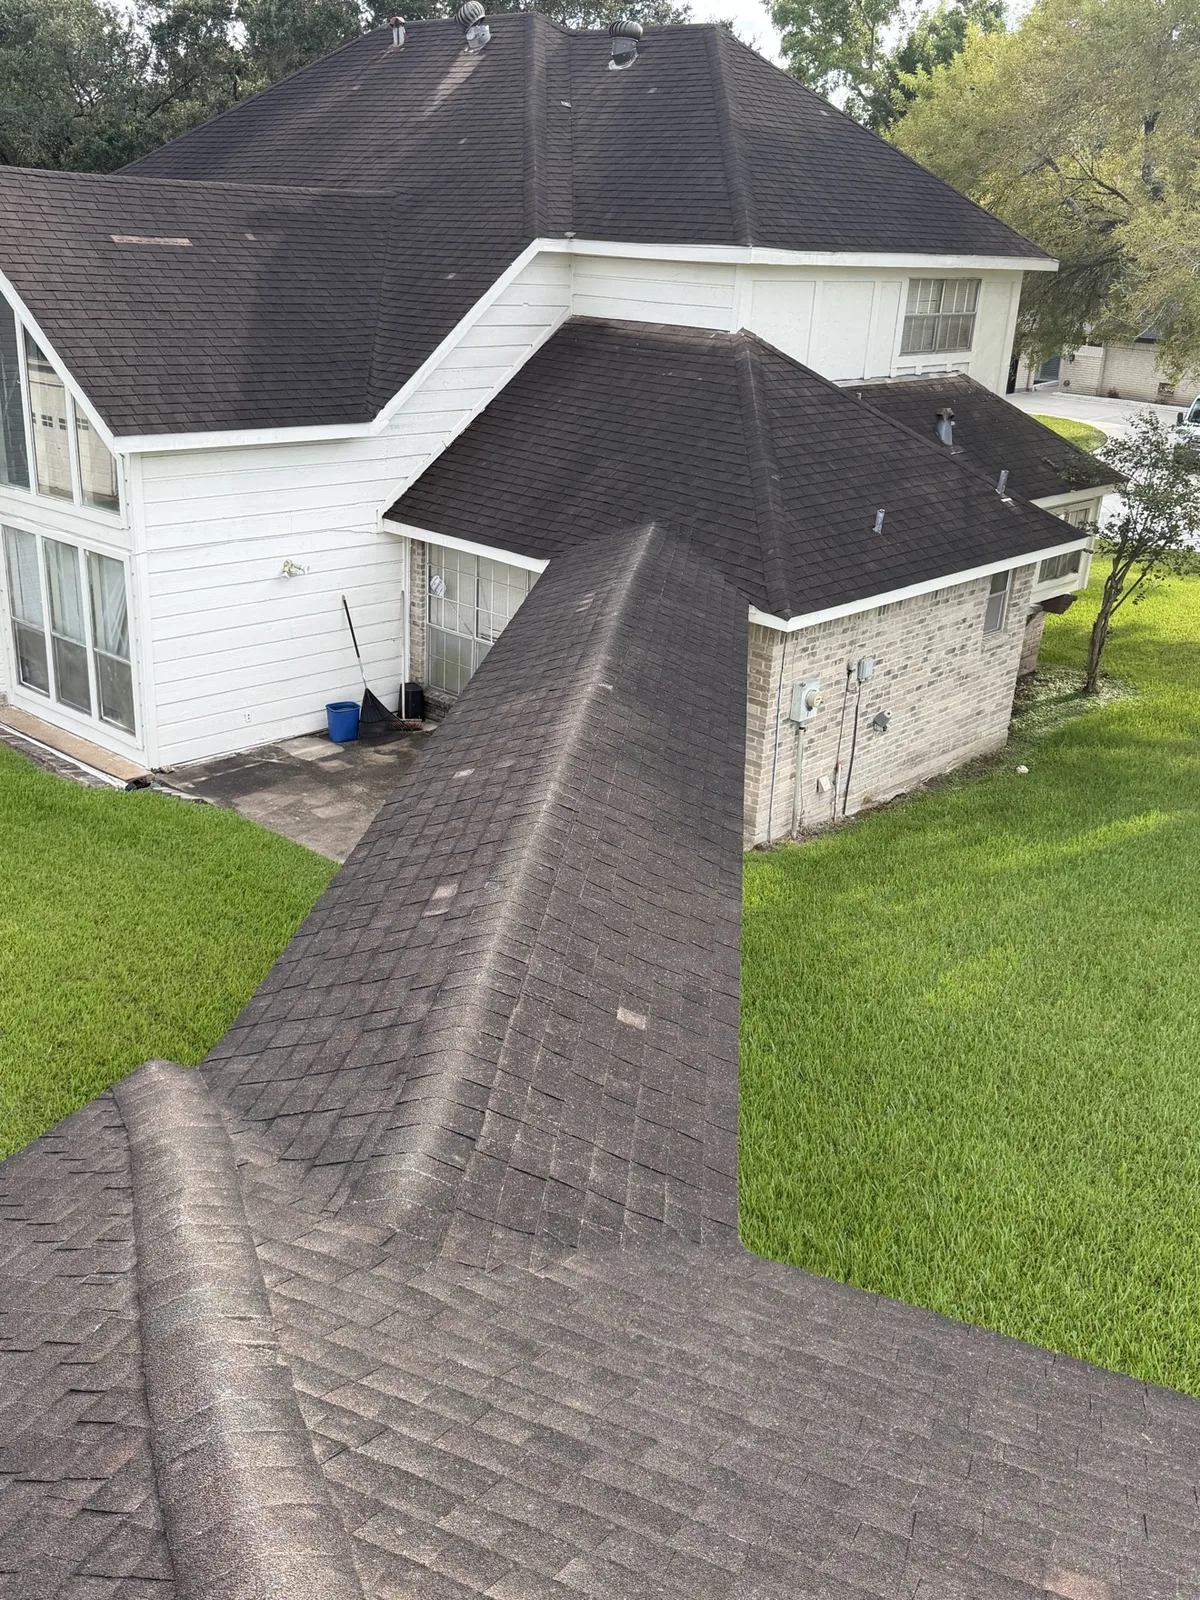
Before — house view: the full roof before work began.
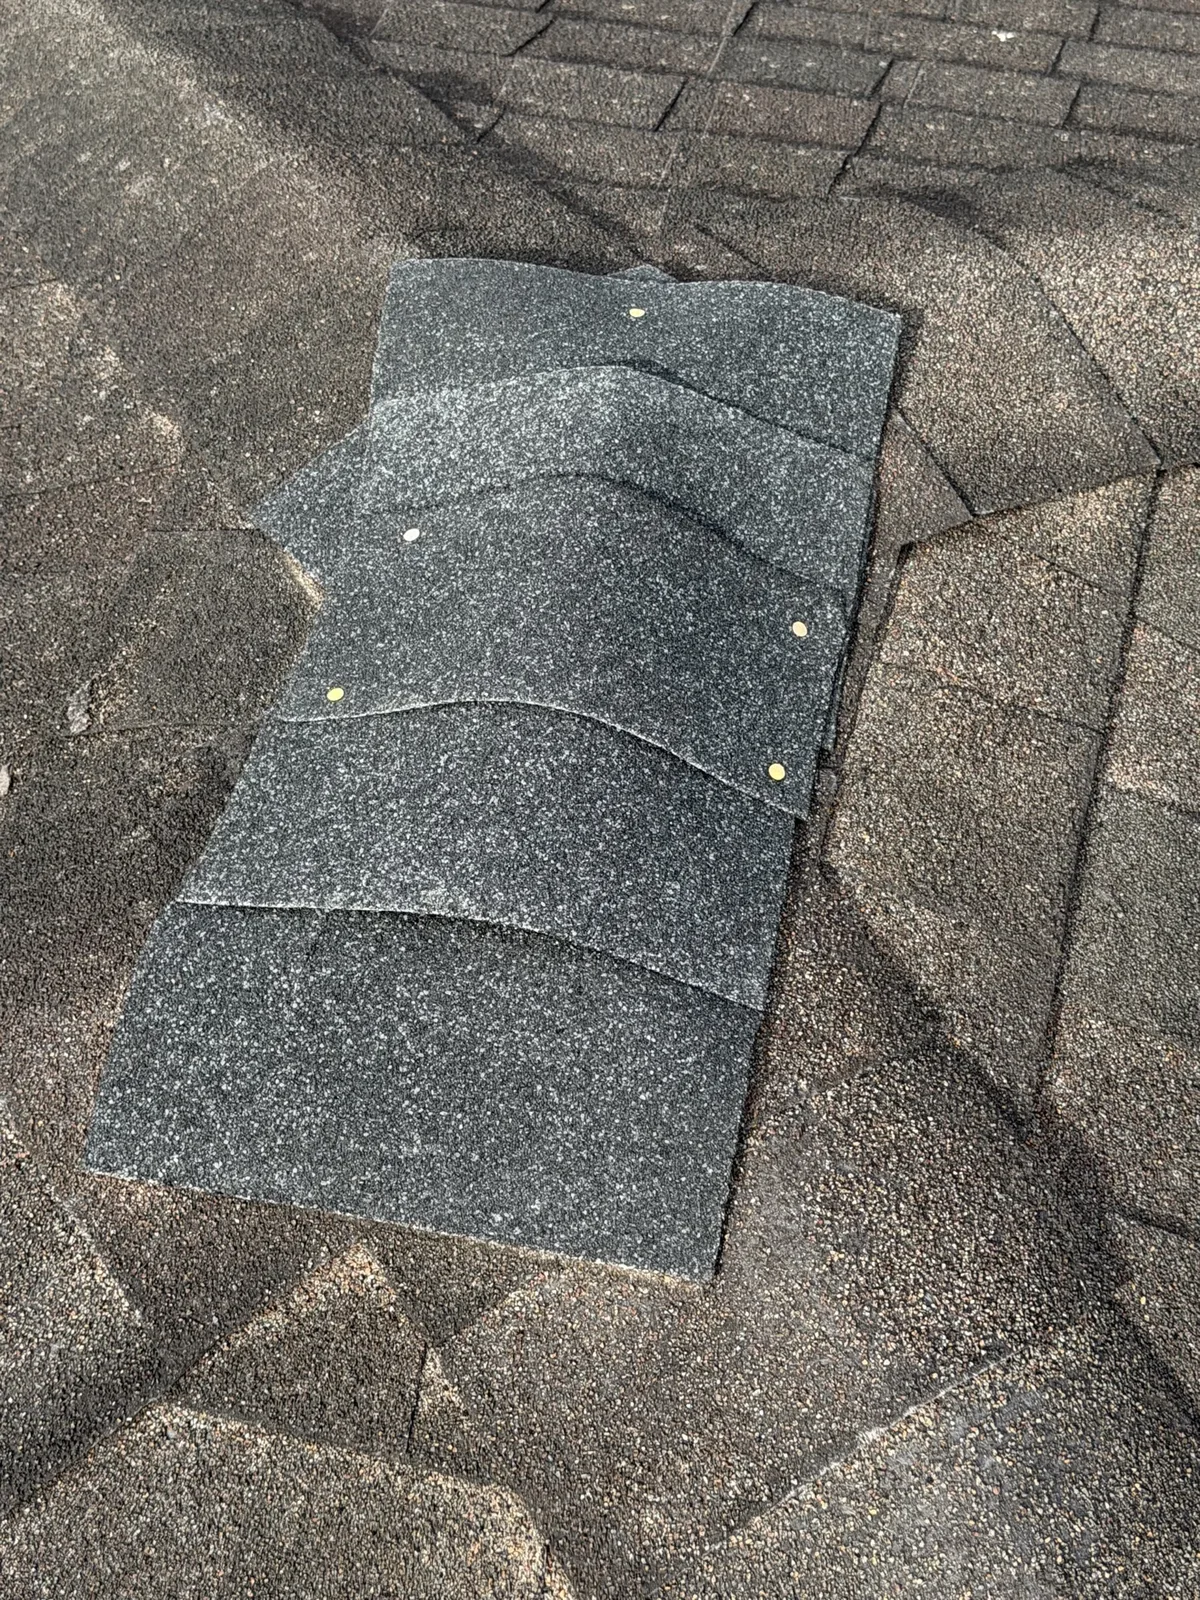
After — new architectural shingles installed and matched to the existing roof.
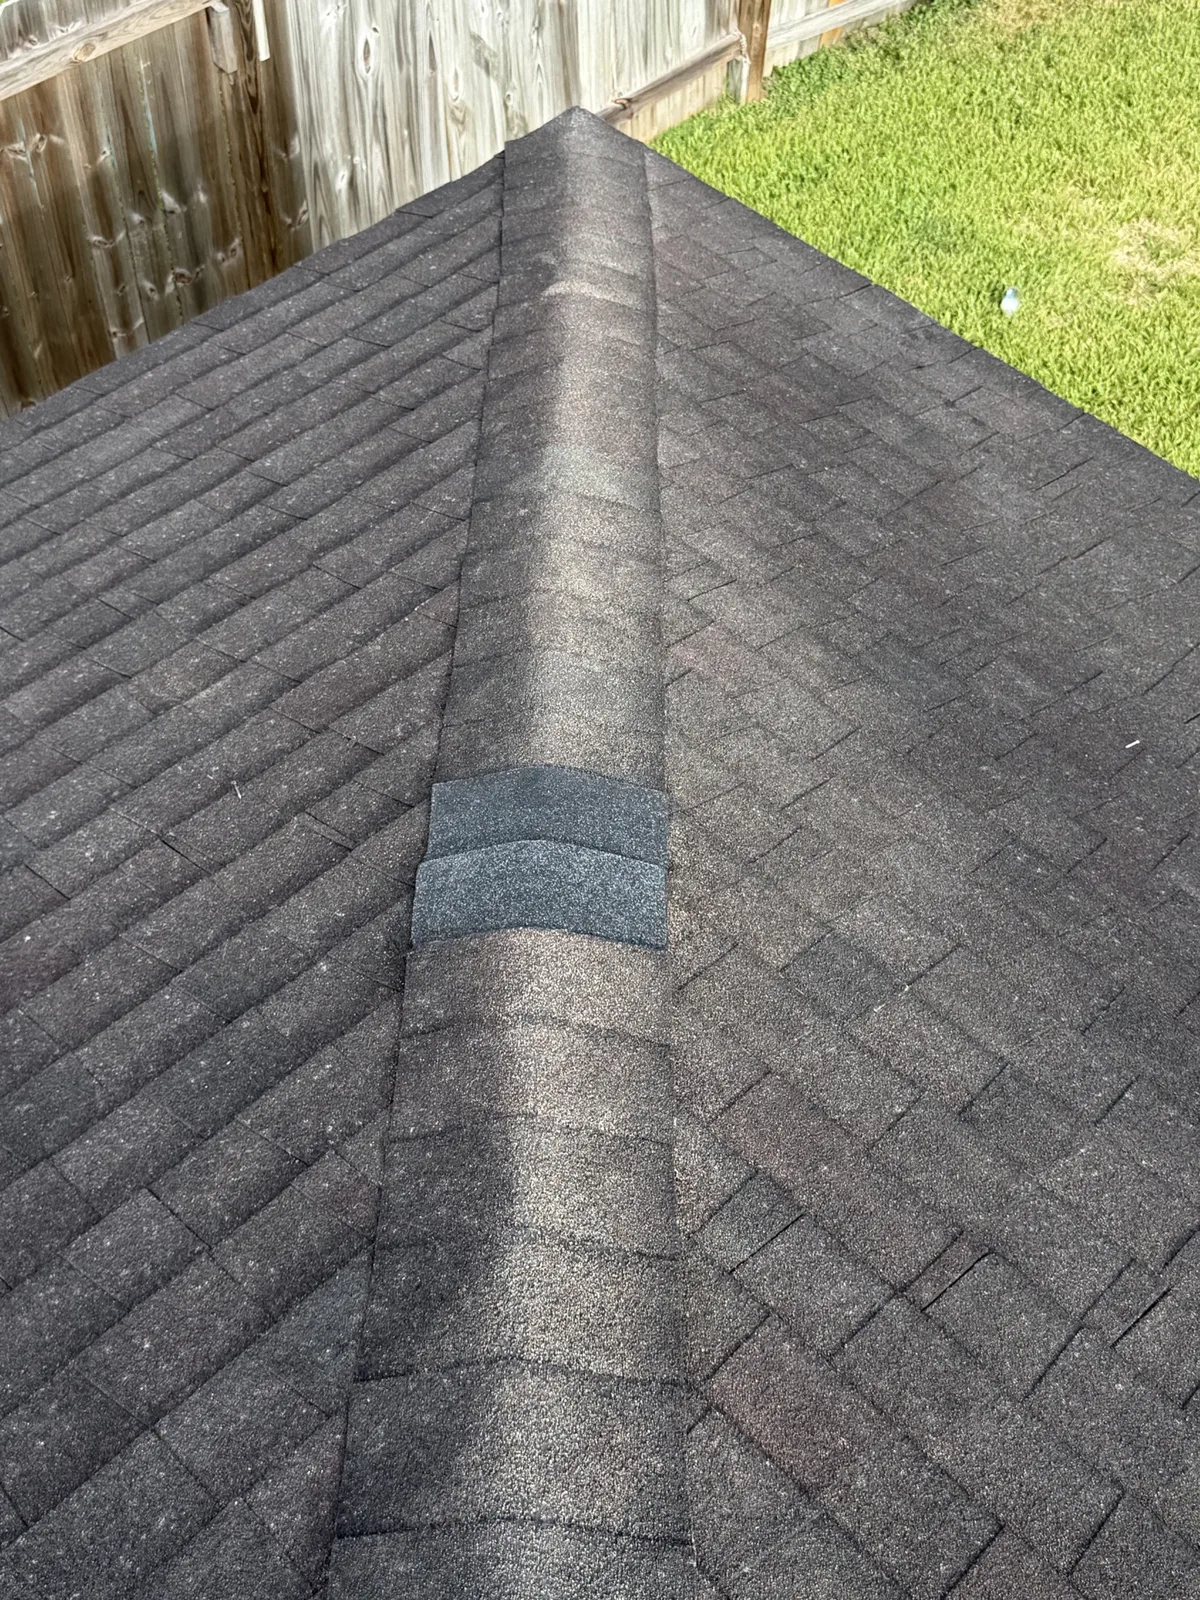
After — rebuilt ridge caps, sealed and finished.
After — video walkthrough of the repaired ridge.
Roof Repair — Steep-Slope Repair With Decking Replacement
Water had rotted the wood underneath the shingles on this steep roof slope. New shingles alone would not have fixed it — the structure underneath had to be rebuilt first.
- Service: Roof repair & decking replacement
The problem
Rotted decking and framing under the shingles — visible the moment the damaged shingles came off. Shingling over this would have failed within a season.
The inspection
Tear-off revealed the rotted structure — documented with photos before any repair plan was made. The rot was cut back to solid wood, so the repair rebuilds the roof instead of covering the problem.
The solution
Cut the rot back to solid wood, install new OSB decking, lay synthetic underlayment over the repair, and shingle over it to match the existing roof.
Work performed
- Tore off damaged shingles over the affected slope
- Removed rotted decking and framing, cut back to solid wood
- Installed new OSB decking
- Laid synthetic underlayment over the repaired section
- Installed new shingles, matched to the existing roof
The result
Solid structure, weathertight surface, and a repair that blends into the existing roof — backed by our 2-year transferable labor warranty on the repair.
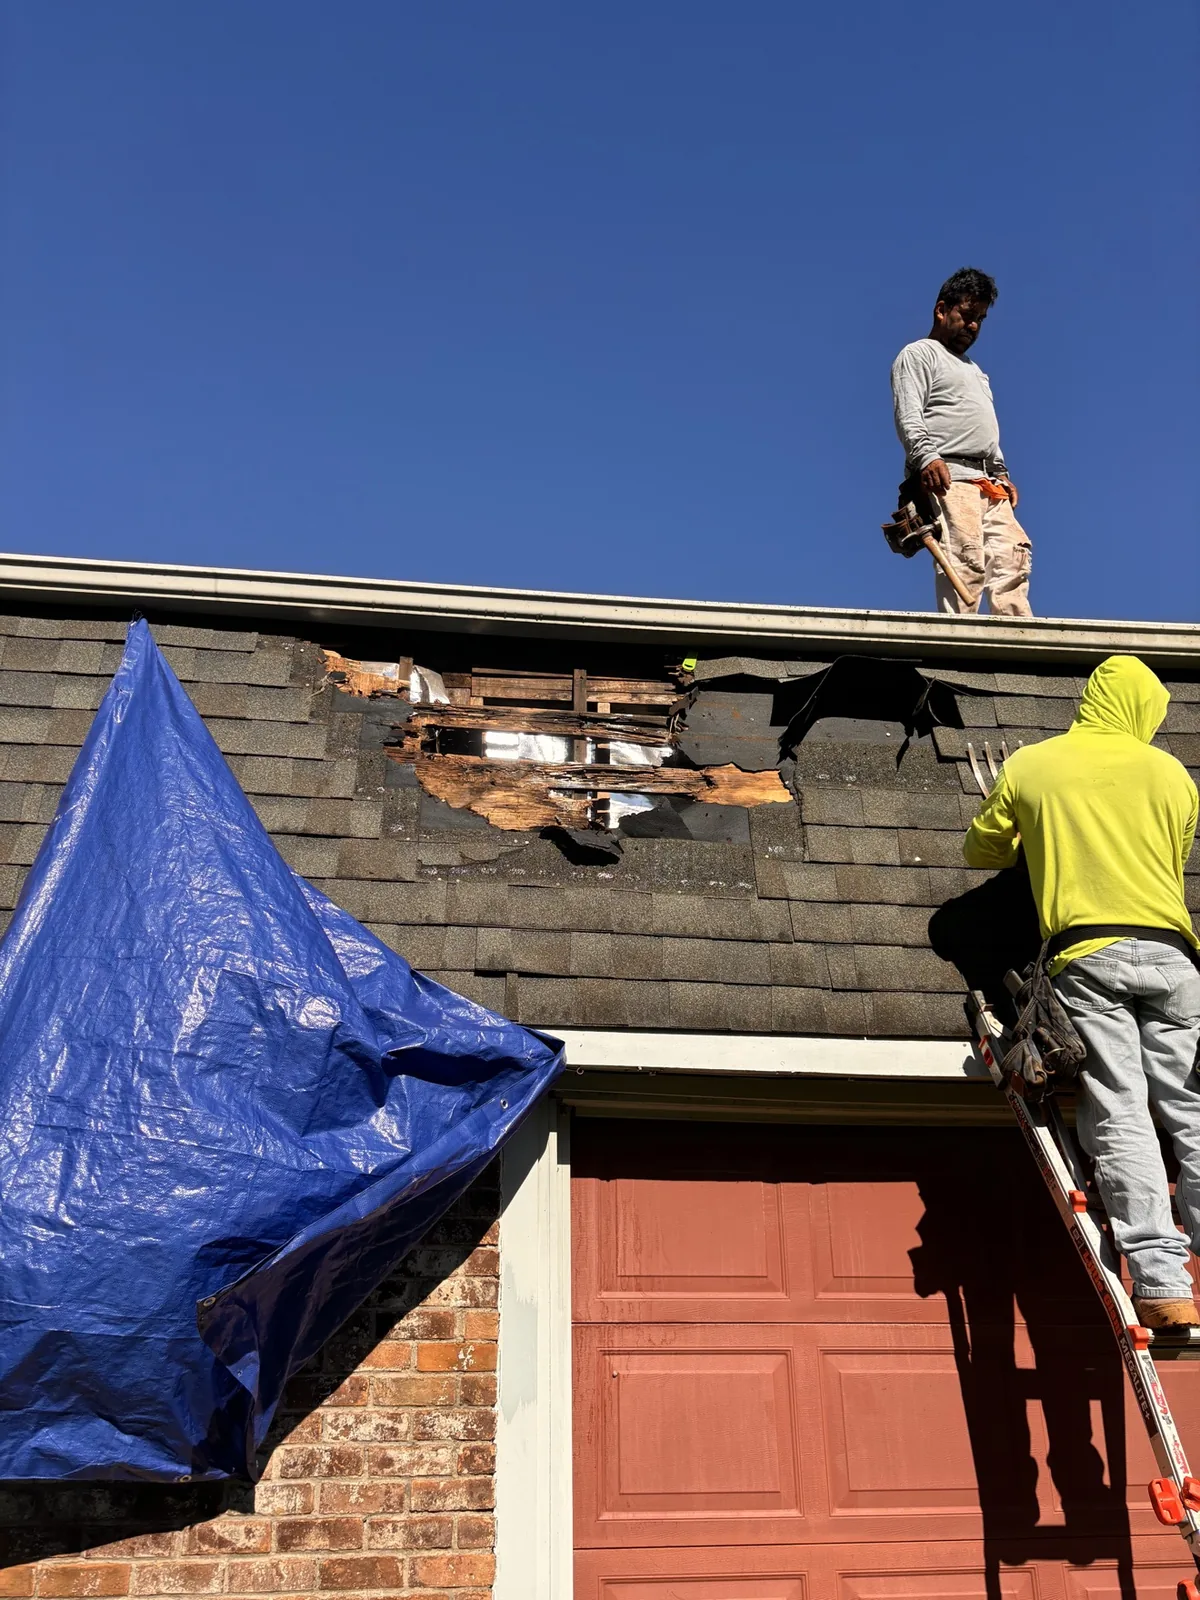
Before — rotted decking and framing exposed during tear-off.
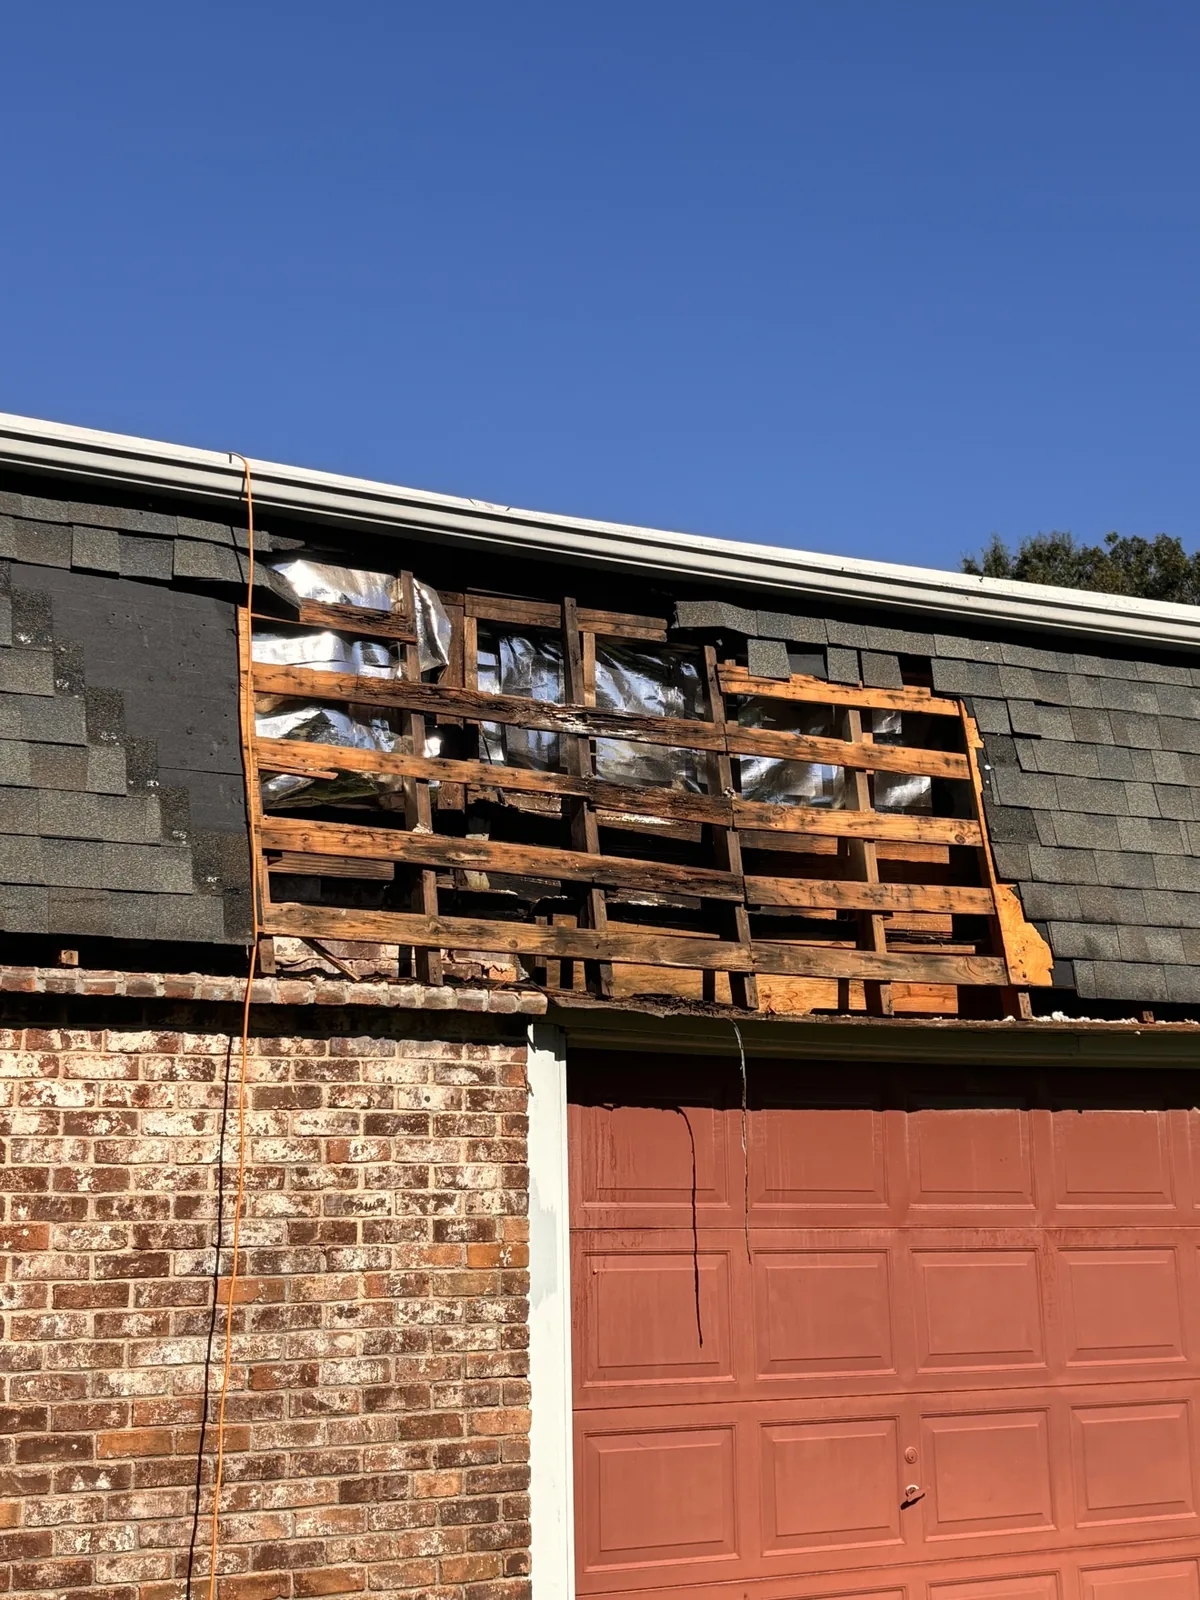
Before — a closer look at the damaged structure under the shingles.
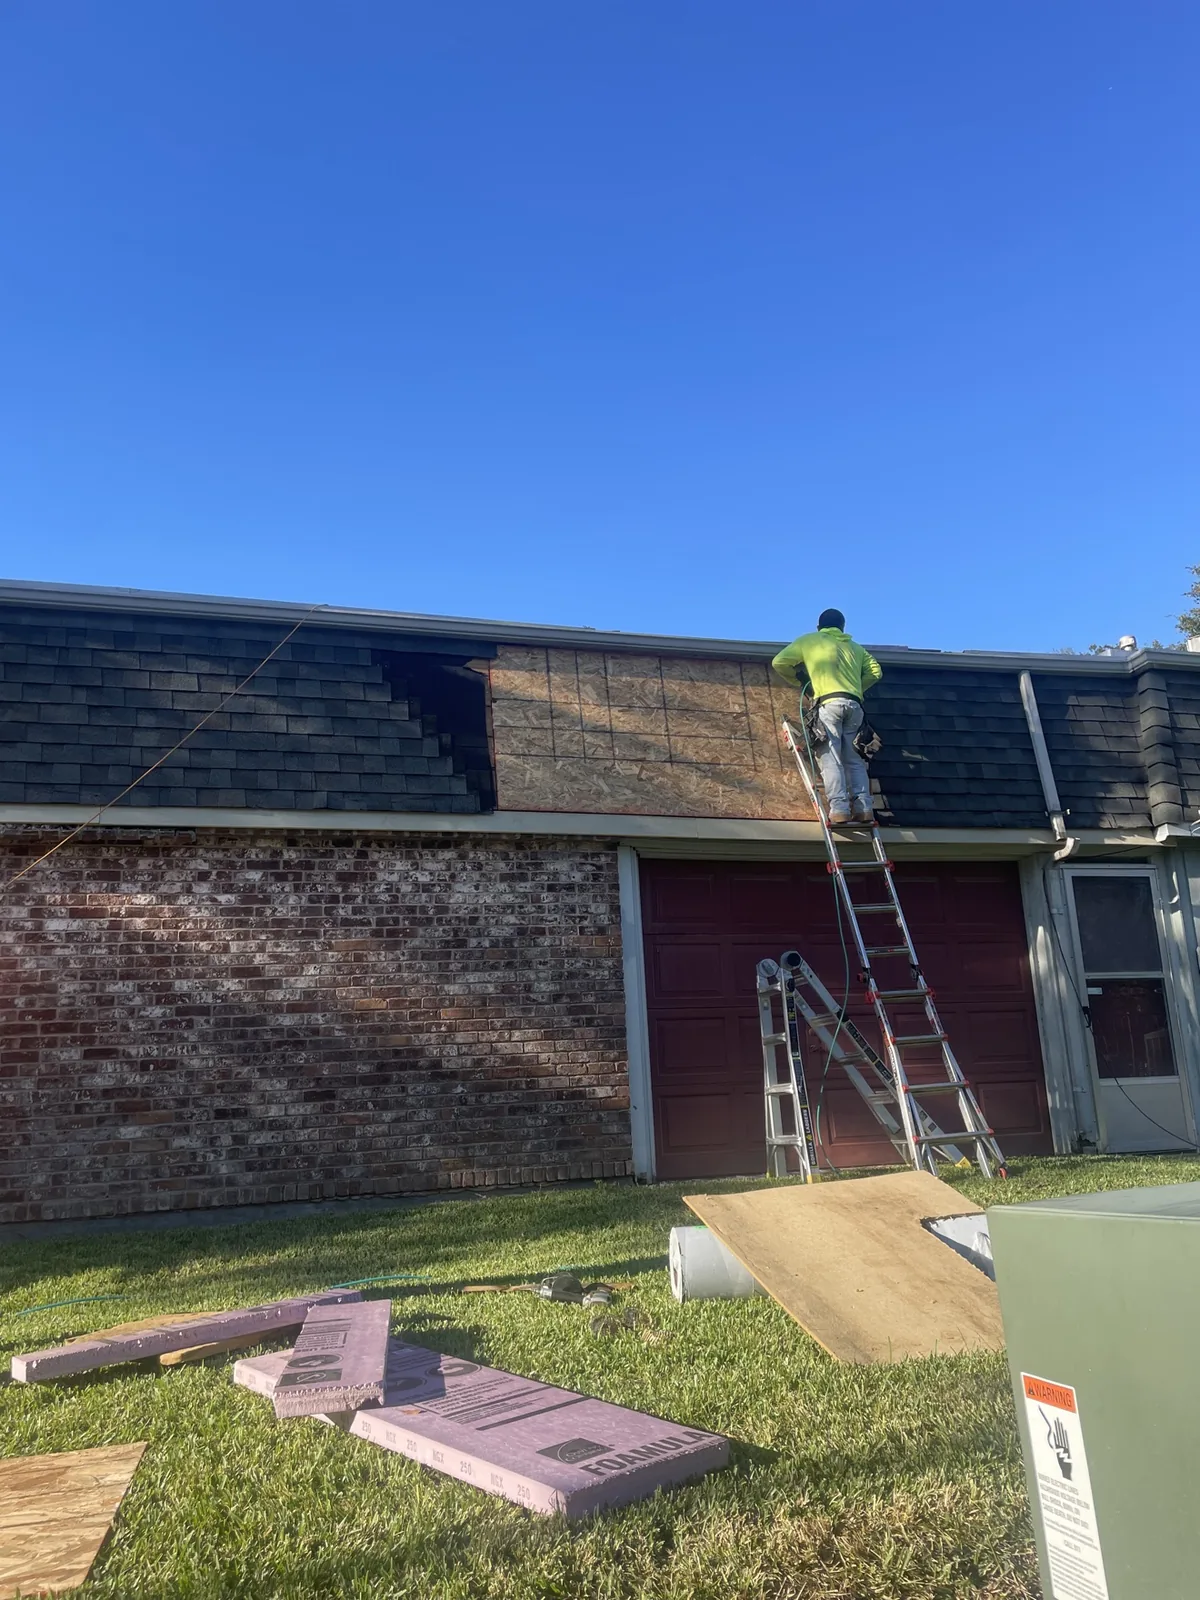
During — new OSB decking installed over the repaired section.
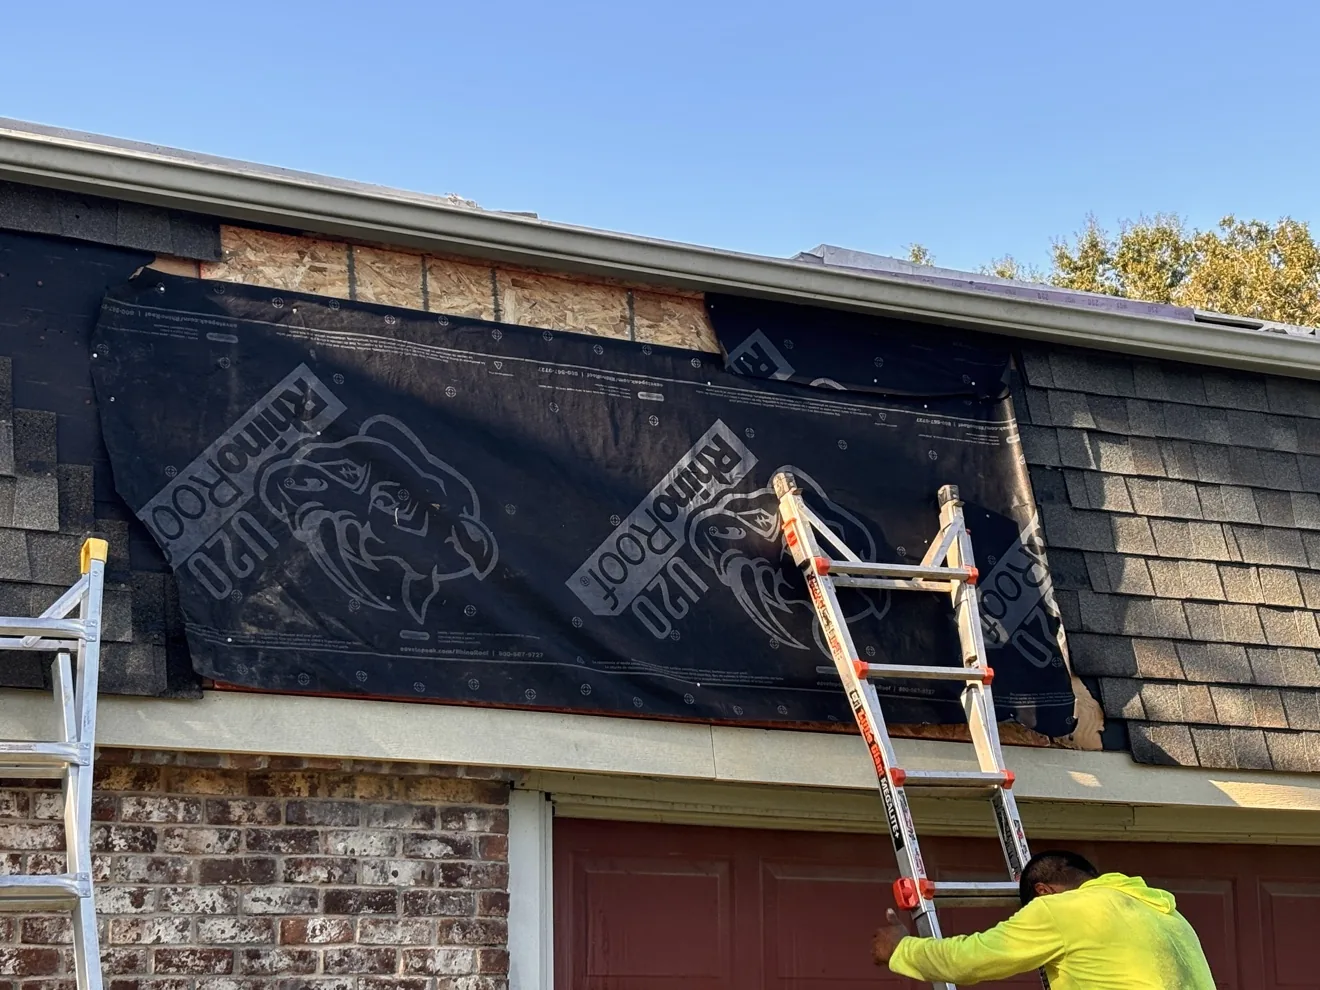
During — synthetic underlayment laid over the new decking.
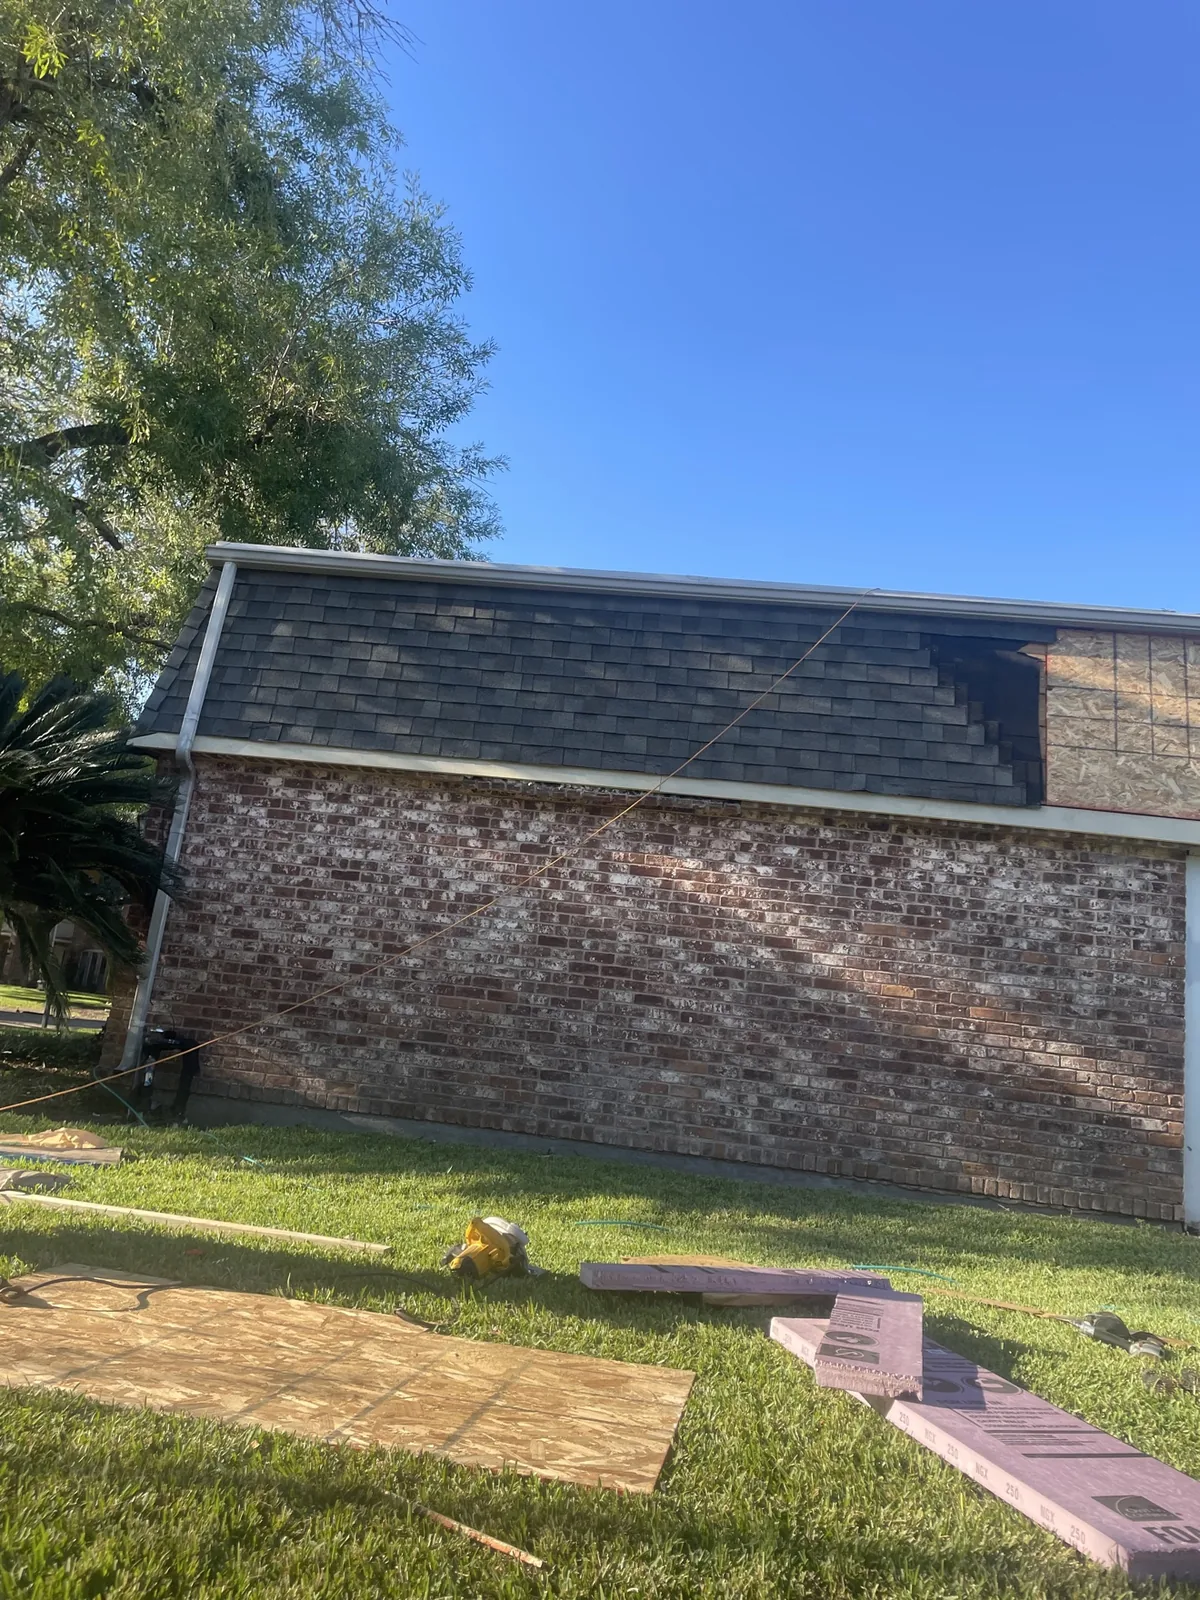
After — new shingles matched to the existing roof.
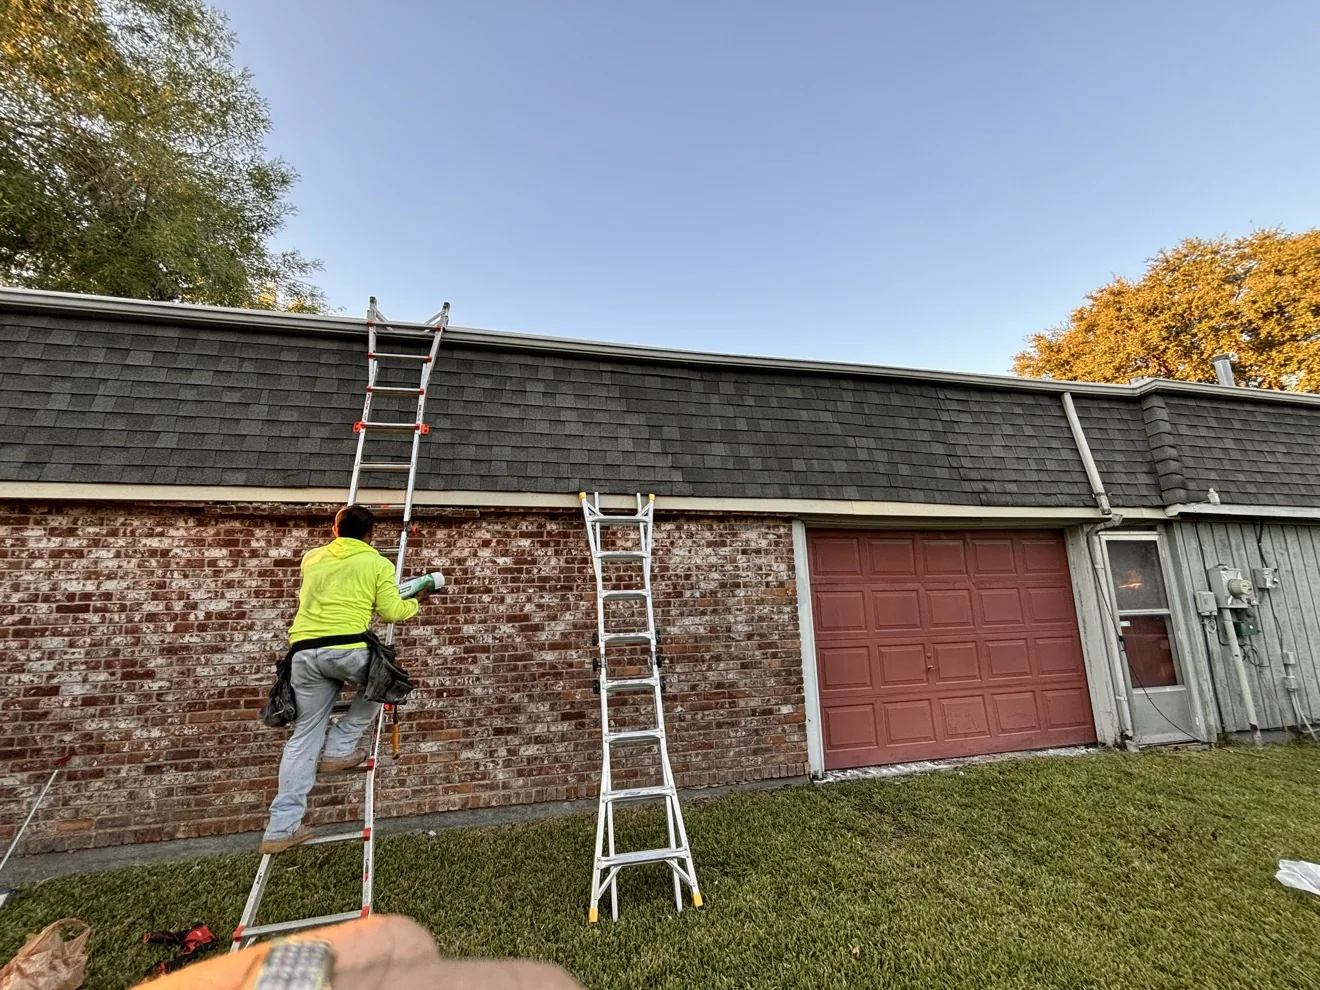
After — the finished repair, weathertight and blended in.
Complete Tear-Off and Roof Replacement
When a roof is past repairing, the old roofing comes off all the way to the decking — and the new roof goes on from a clean base.
- Service: Full roof replacement (tear-off)
The problem
This roof needed a full replacement — a complete tear-off of the old roofing down to the wooden decking.
The inspection
The tear-off exposes every inch of decking, which gets checked before anything new goes on — any soft or damaged sections are replaced, not covered up.
The solution
Old shingles torn off completely, decking verified, then new underlayment and shingles installed — one slope at a time, with the open sections protected as the work moves across the roof.
The result
A new roof built from the decking up — backed by our 5-year transferable labor warranty on new installs.
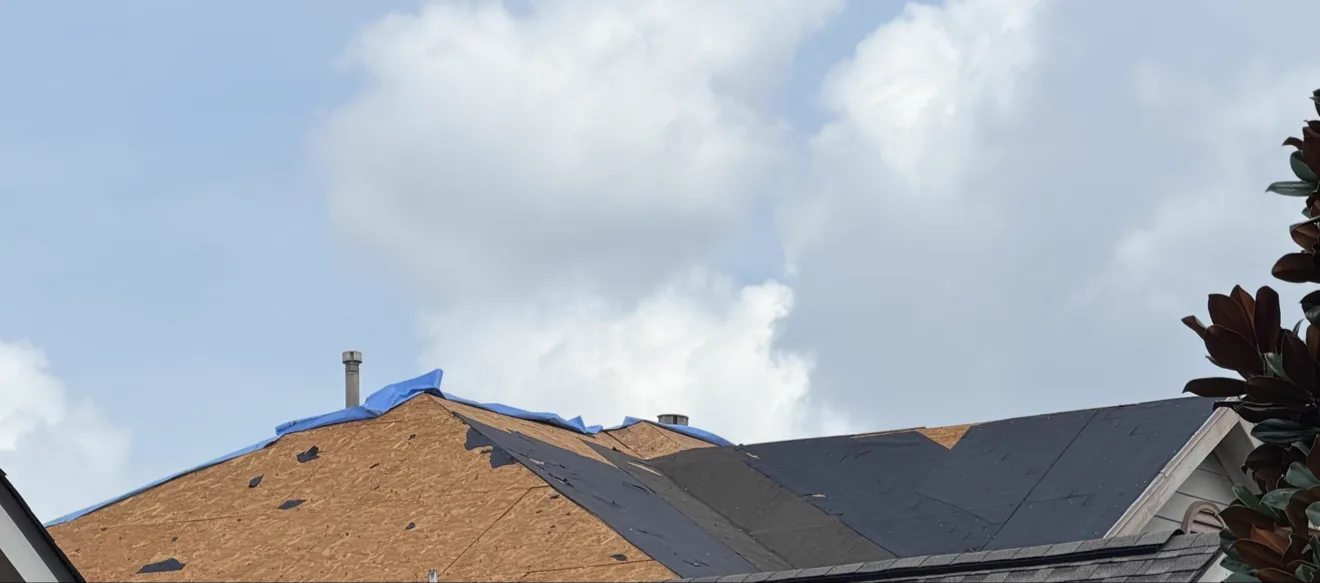
Complete tear-off in progress — stripped to the decking on one slope, new shingles going on the next.
Worn Pipe Boot — A Common Leak Source, Caught Early
Some of the most expensive roof damage starts with the cheapest parts. This vent pipe's rubber boot had cracked with age — a classic slow-leak setup.
- Service: Roof repair (pipe boot)
The problem
The rubber seal around this vent pipe had cracked and pulled away — an open path for water straight into the attic with every rain.
The inspection
Close-up inspection confirmed the failed seal. The surrounding shingles were still healthy, so a full replacement was never on the table.
The solution
Old boot removed, new pipe boot installed and sealed to the surrounding shingles.
The result
A sealed penetration for a fraction of replacement cost — backed by our 2-year transferable labor warranty on the repair.
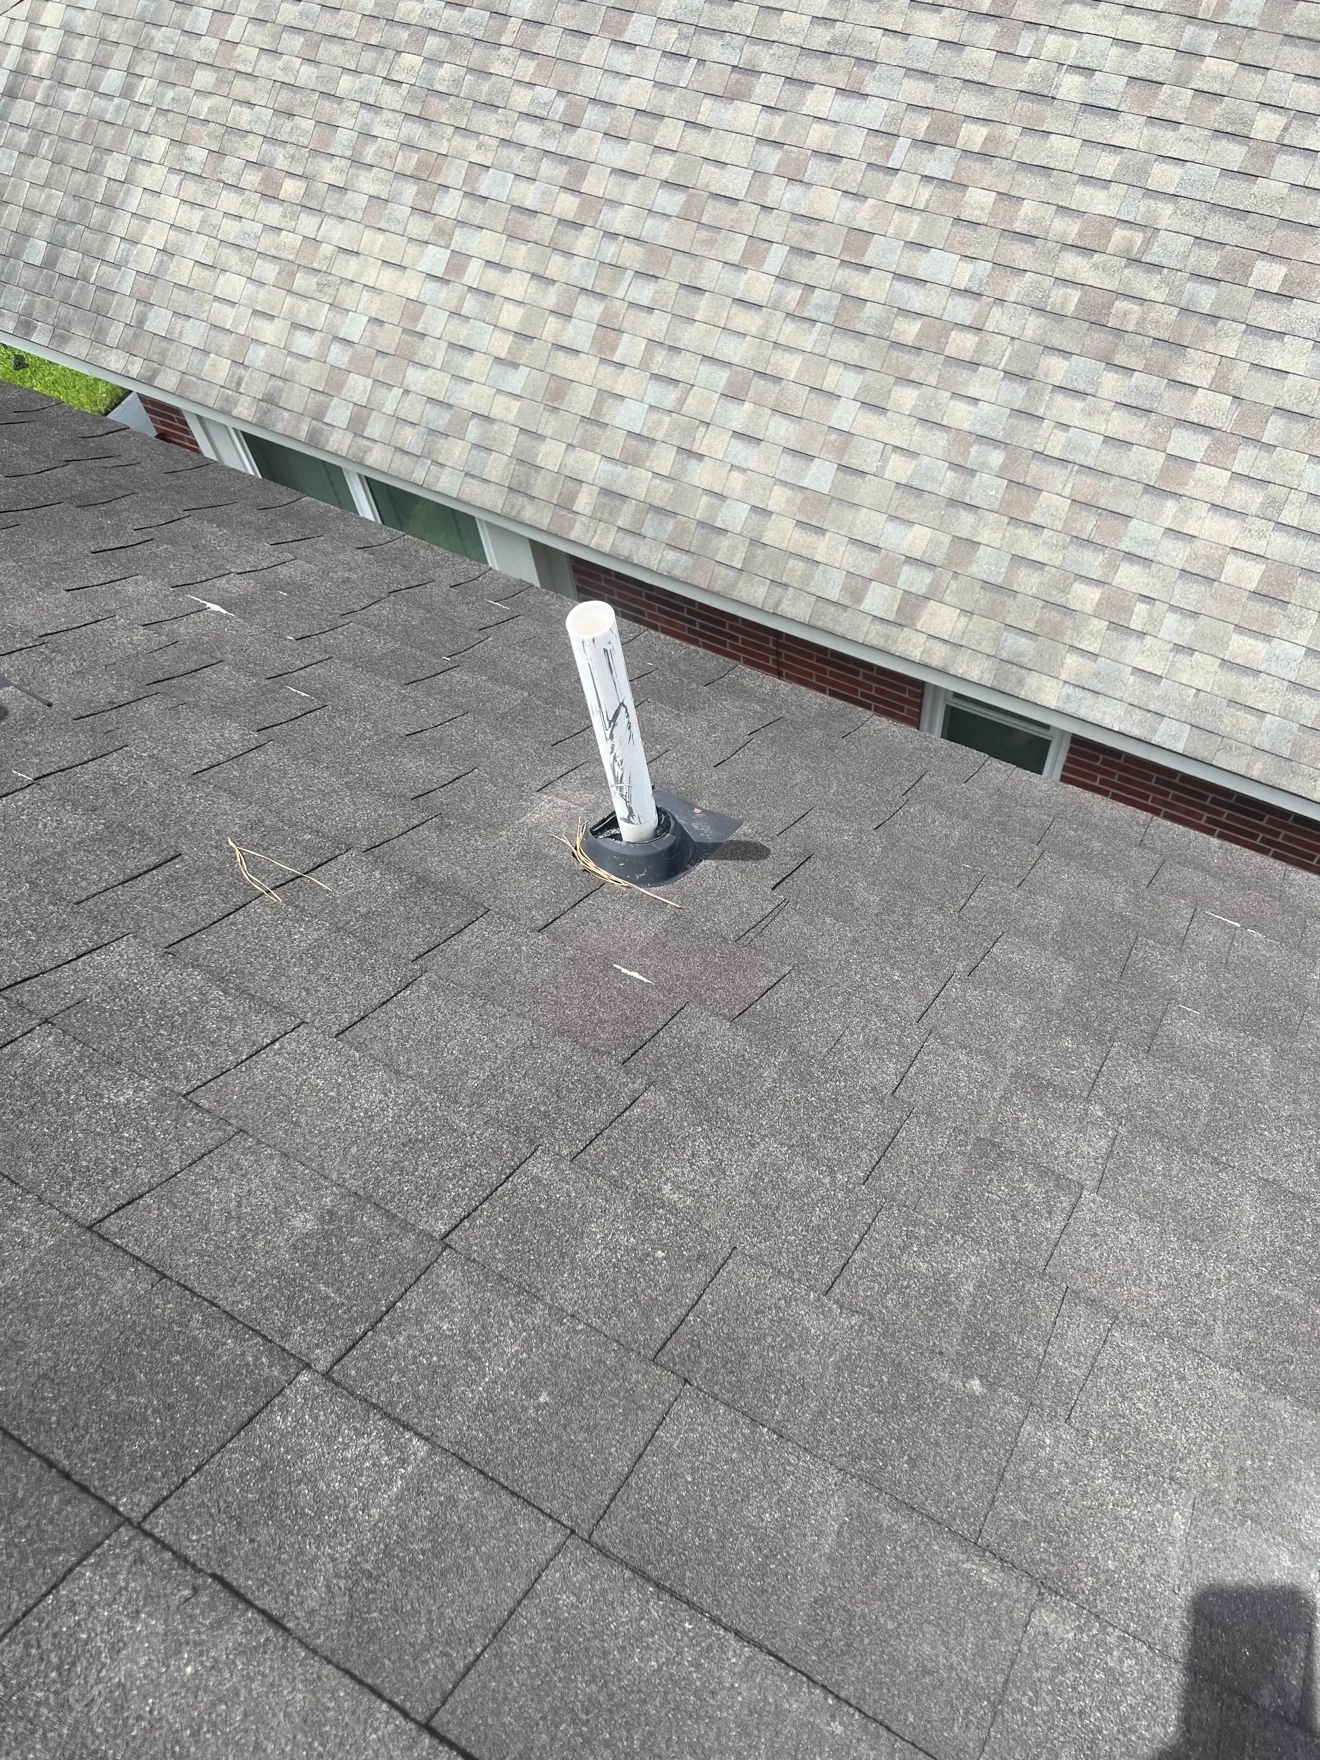
A worn pipe boot — cracked seals like this are one of the top causes of roof leaks.
Decking Replacement — New Wood Under the Repair
A repair is only as good as what it sits on. This section's decking had to be replaced before new shingles could go down.
- Service: Roof repair & decking replacement
The problem
Damaged decking under the shingles — patching new shingles over compromised wood would have failed within a season.
The inspection
The soft section was identified during tear-off, cut back to solid wood, and documented with photos.
The solution
New OSB decking installed over the repaired section, ready for underlayment and shingles matched to the existing roof.
The result
Solid structure under the repair — backed by our 2-year transferable labor warranty.
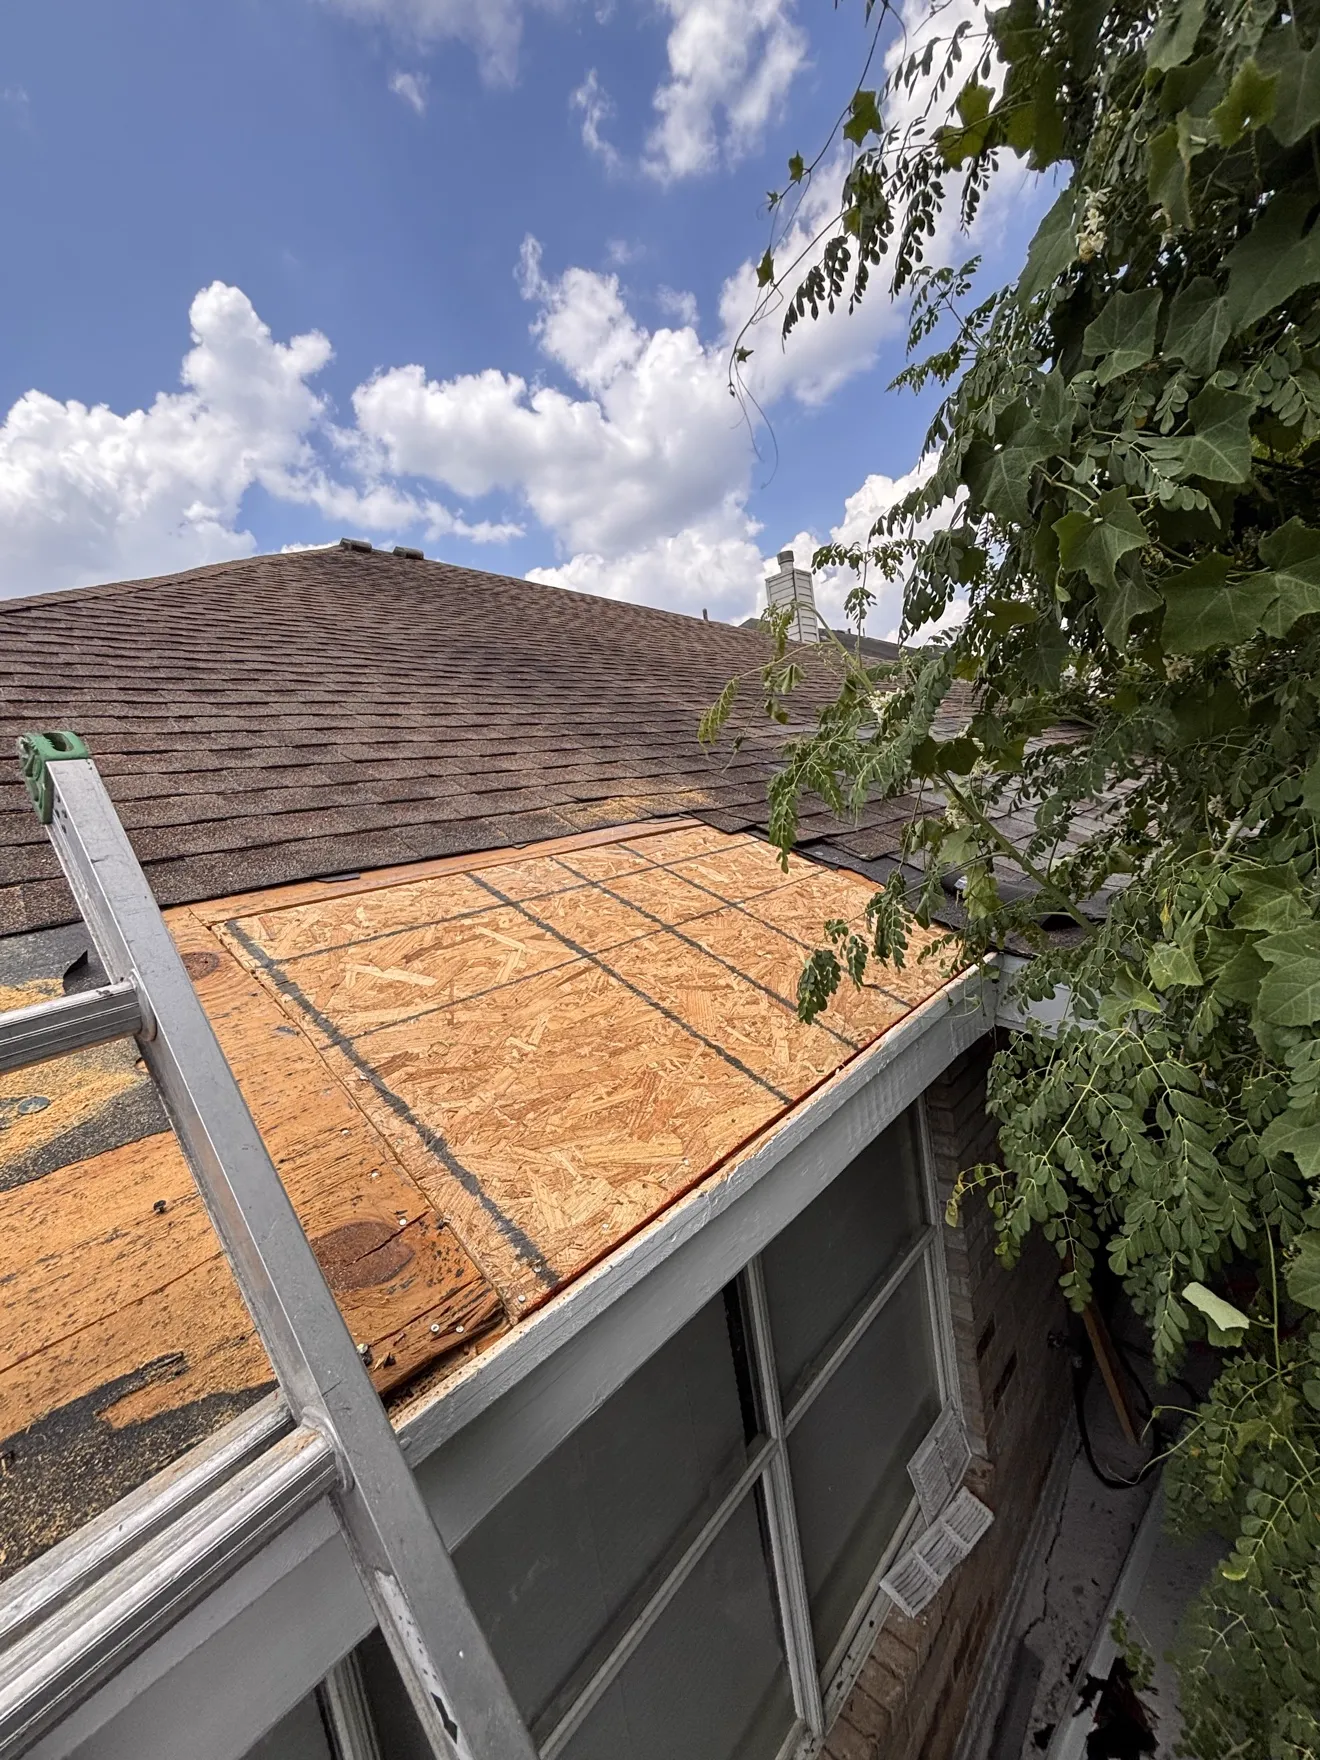
New OSB decking going in over a repaired section.
Problem → Inspection → Solution → Work performed → Result.
Every project we publish here follows the same format: what was wrong, what we recommended and why, the work actually performed, and the finished result — with before, during, and after photos (and drone imagery where useful). No stock photos, no borrowed jobs, no invented details.
James Hardie Siding Repair — Gable End
Damaged fiber-cement boards on a gable end: the old siding comes off, the sheathing and weather barrier get checked, and new James Hardie boards go on.
- Service: Siding repair (James Hardie fiber cement)
The problem
Fiber-cement siding boards on this gable end were damaged and had to come off — a partial repair, not a full re-side.
The inspection
With the boards removed, the sheathing and weather barrier underneath were checked before any new material went on — a repair is only as good as what sits behind it.
The solution
Damaged boards removed, substrate verified, and new James Hardie fiber-cement boards installed on the gable.
The result
New boards in place on the gable, ready for paint — backed by our 2-year transferable labor warranty on the repair.
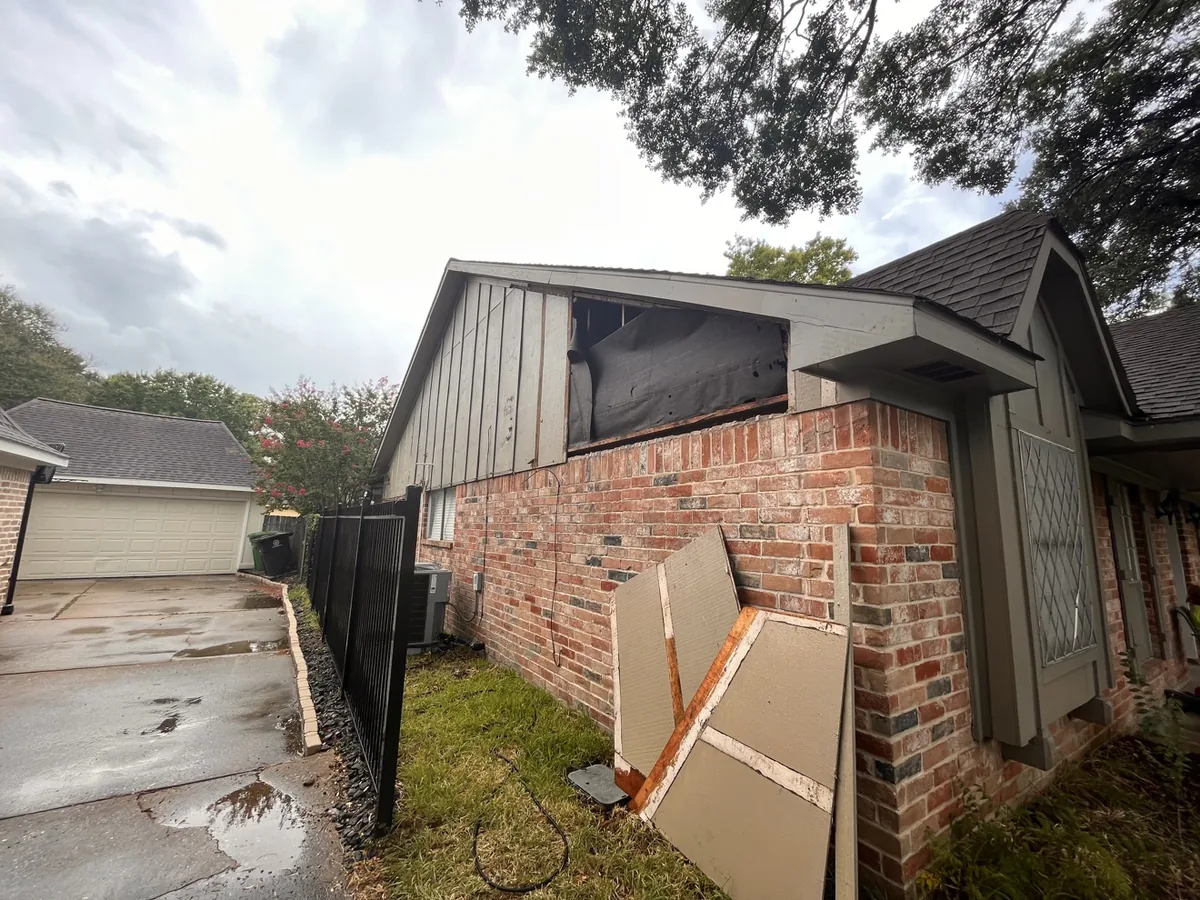
Damaged boards removed; weather barrier exposed.
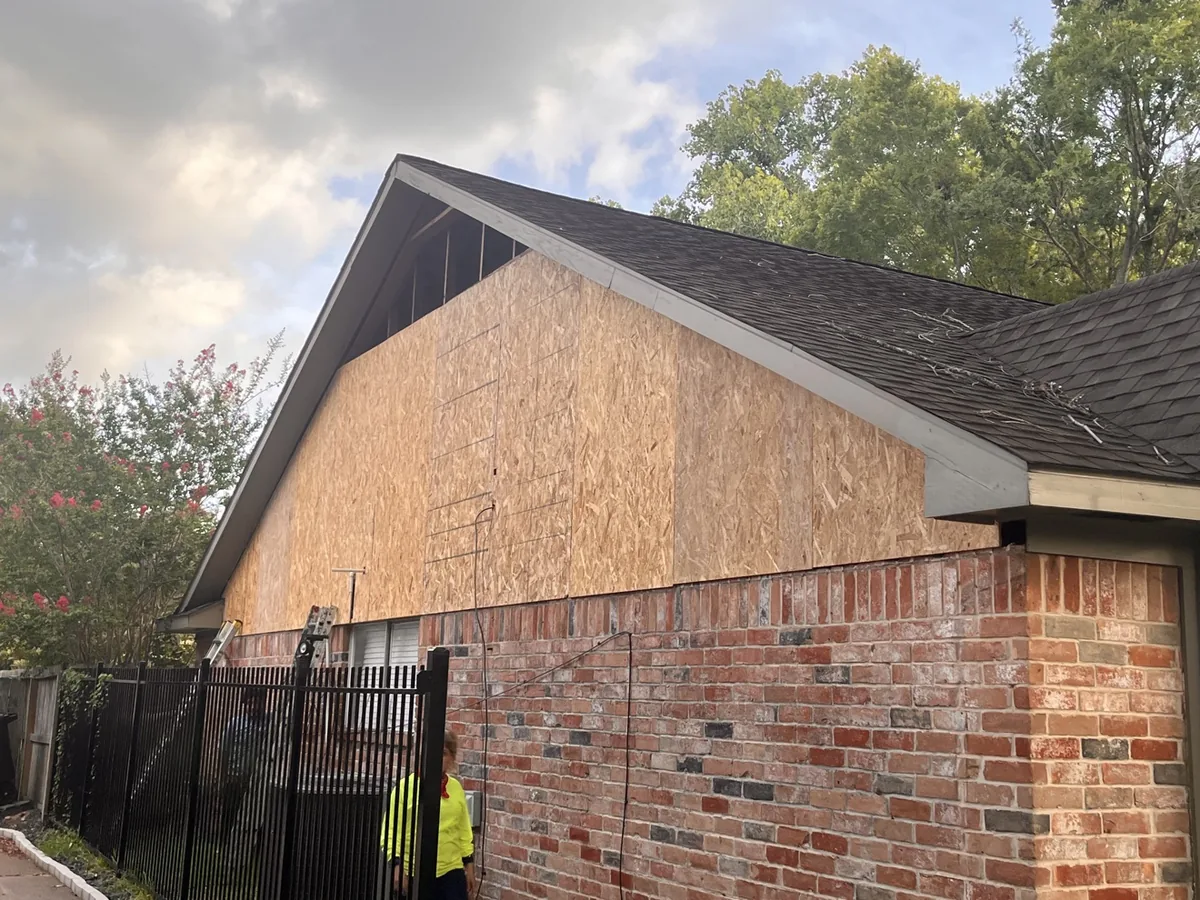
Sheathing checked before new boards go on.
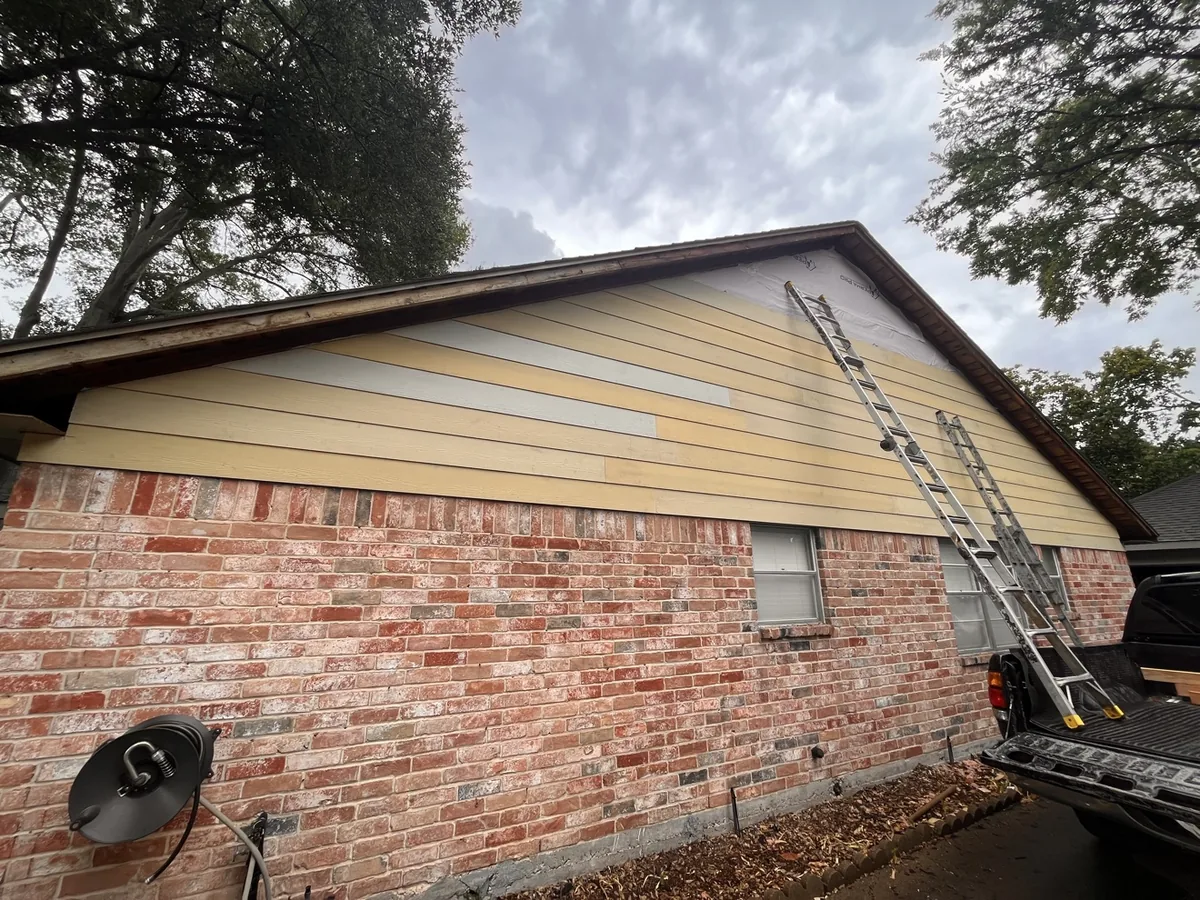
New James Hardie boards installed.
New documented jobs land here.
We are adding newly photographed jobs as they are documented. Each follows the same Problem → Inspection → Solution → Work performed → Result format with real photos from our crews — no stock photography, no borrowed jobs.
Project FAQs
Why do you photograph your work?
So you can see exactly what was done and why — the damage before, the work during, and the finished result after. Photos also become part of your records, which helps with future maintenance and any insurance questions down the road.
Can I see photos of a job like mine before I commit?
Yes — just ask. If we have documented a similar repair or replacement, we will show it to you during your free inspection so you know what to expect.
Do you document every job this way?
We photograph our work with before, during, and after photos as standard practice, using drone imagery where it helps. Fully published case studies like the one above are added here as they are completed.